Creating a Sports Team With Crosscheck Sports
Using a cool app I made for managing sports teams, learn how to create your sports team.
Wed, October 26 2022
Jake Landers
Developer and Creator
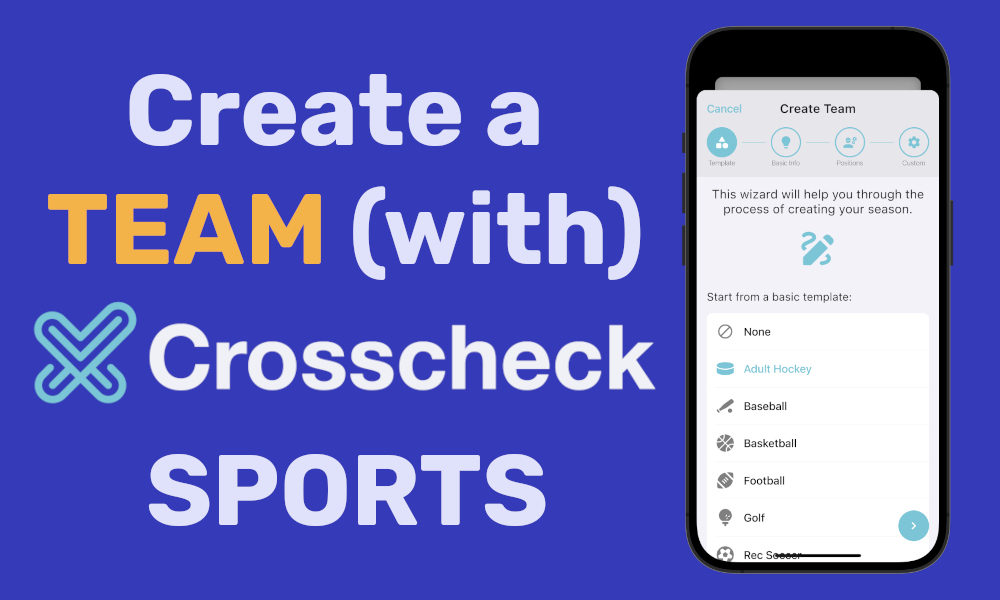
Table of Contents
What Is Crosscheck Sports?
Crosscheck Sports is an app that I built to solve a lot of the issues I had managing my college hockey team. So let's get right into how to setup your team, seasons, and roster on my sports management app.
Downloading The App
The first step is to download the app on whatever platform you are using.
The mobile app is the definitive Crosscheck Sports experience
Creating An Account
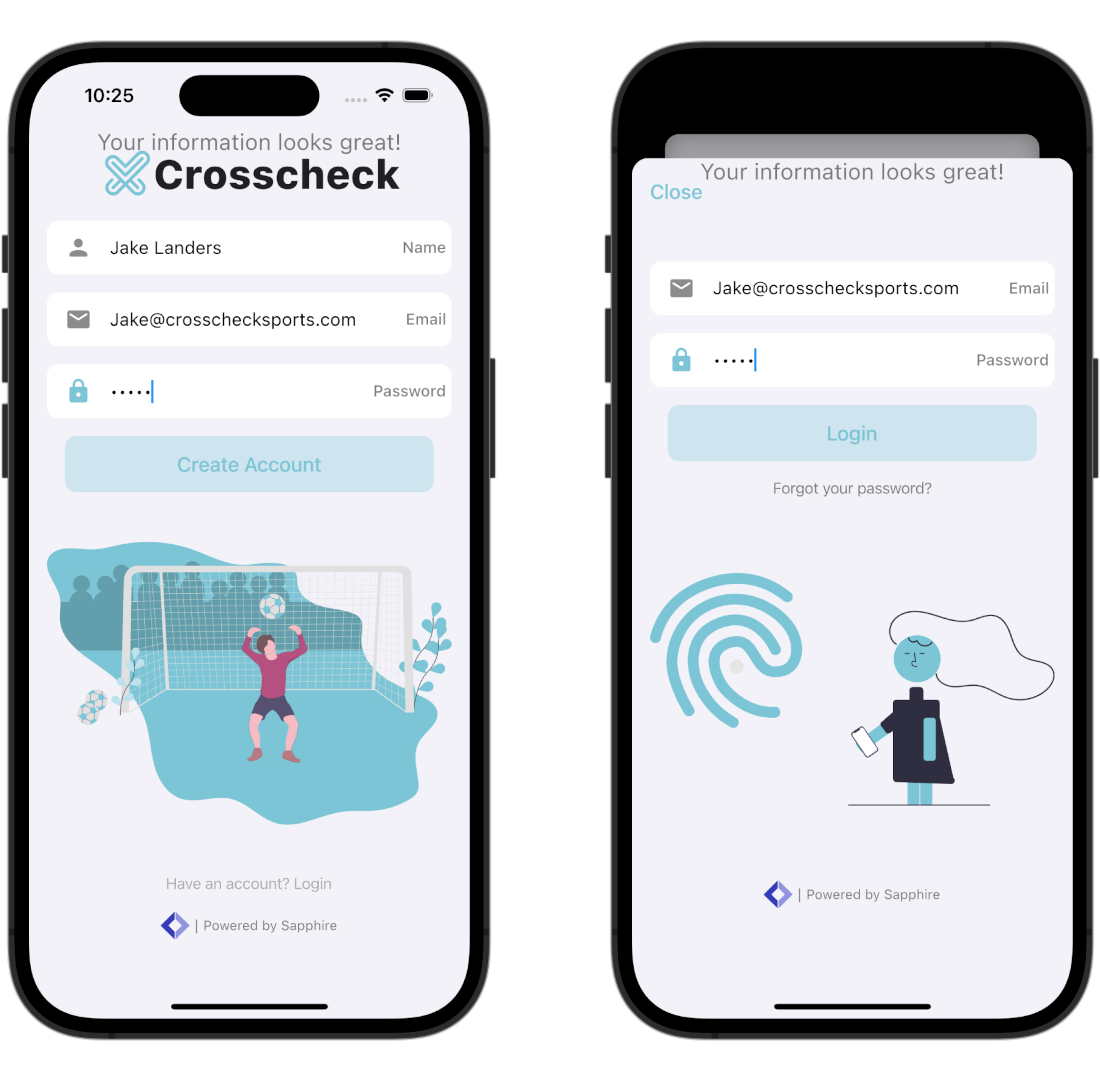
The next step is to create your Crosscheck Sports account. I don't collect any more information than what is necessary to create your account. This boils down to your email, and a name.
Login
If you already have an account, go ahead and input your information under the "Have an account? Login" button.
Homepage
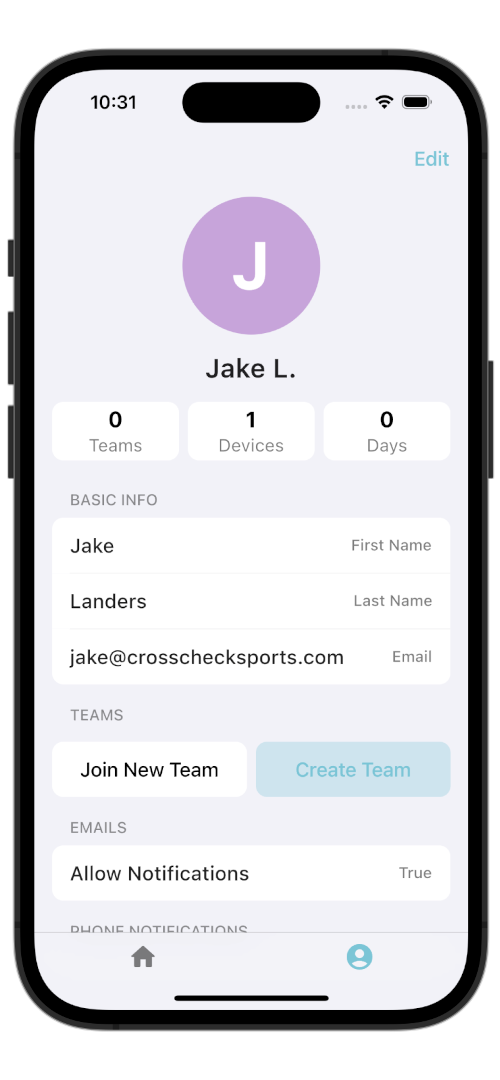
Congrats! You have created an account on Crosscheck Sports! This is the dashboard screen. Now, you are not on any teams at the moment, so this page is a little bare. If you got an email from Crosscheck support with a team code from your team admin, you can input that now.
User Profile
You can view your account details by clicking the user profile icon on the tab bar. Here you can edit your name, phone number, email and mobile notifications, send some suggestions, and logout.
Creating Your Team
Templates
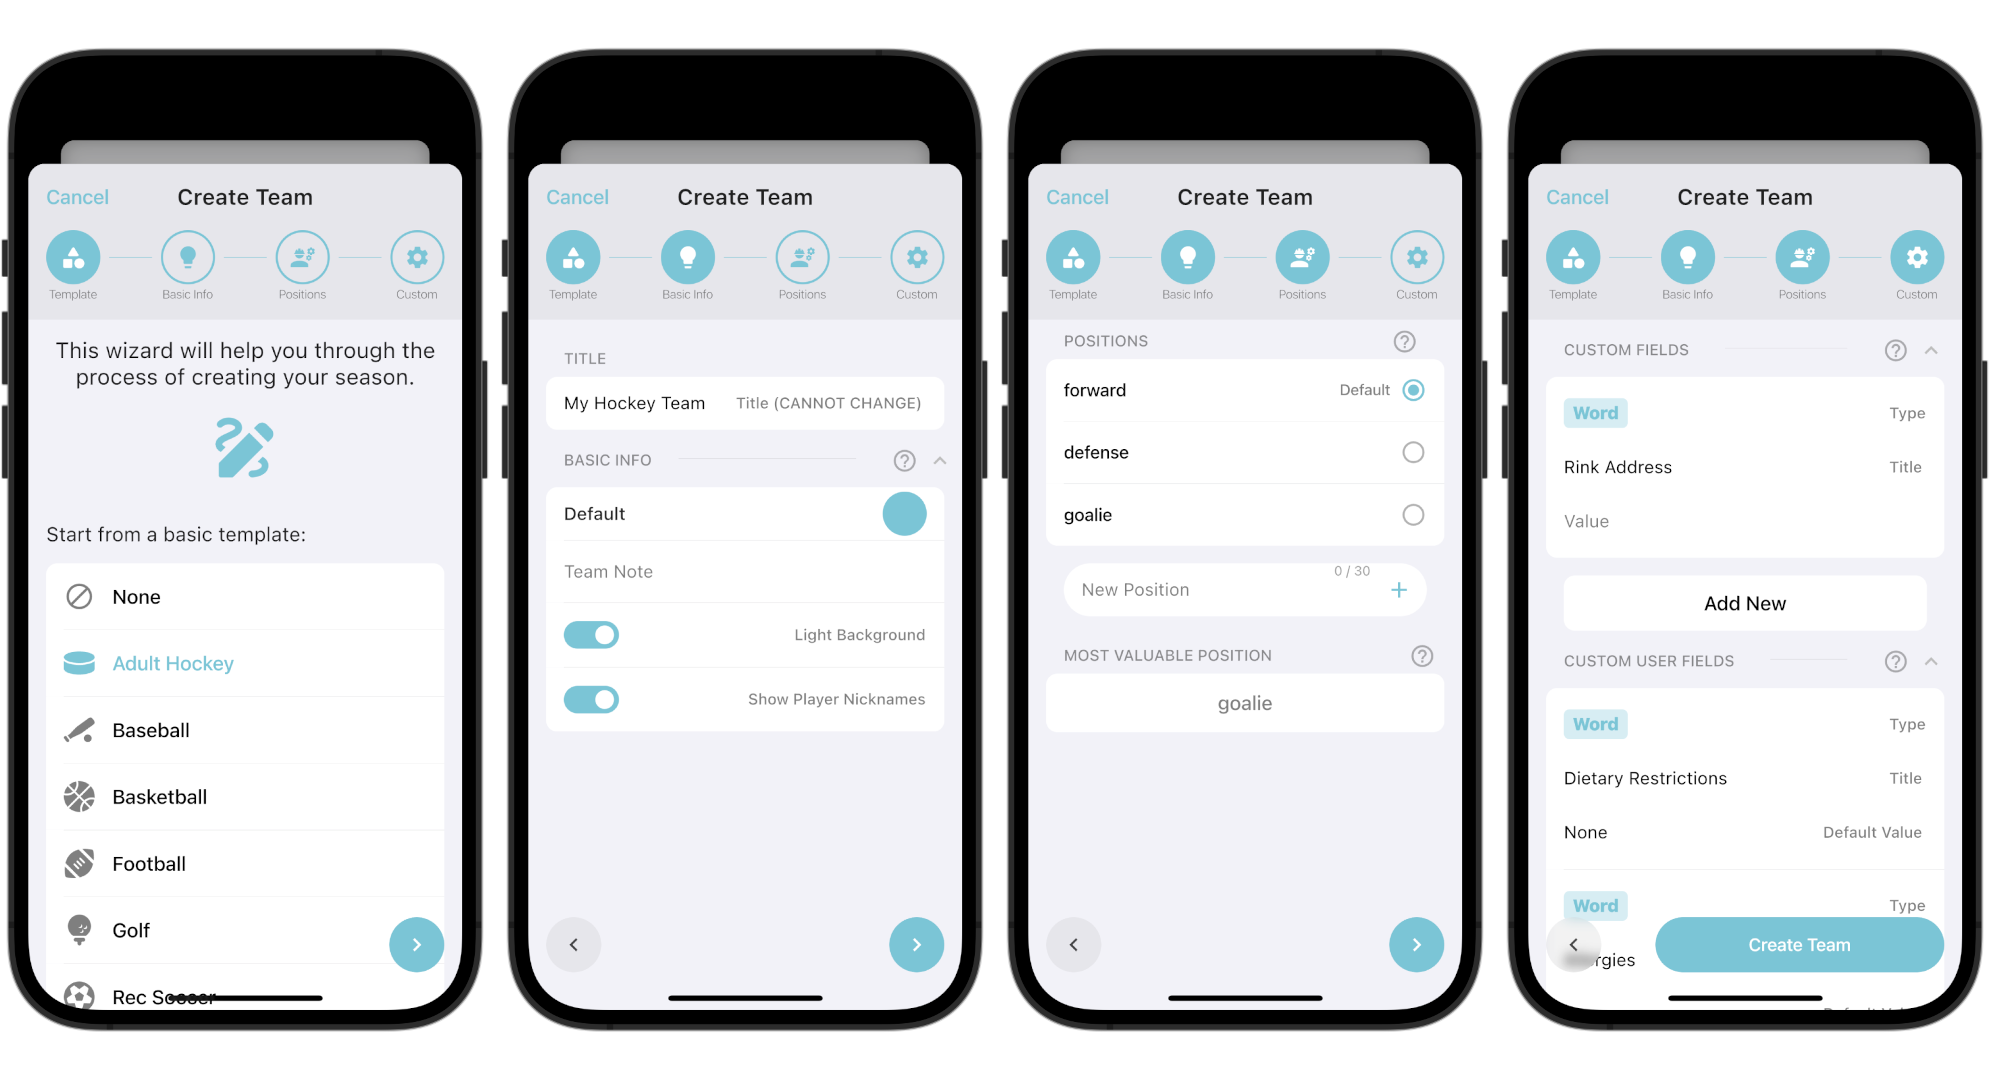
Go ahead and click the "Create Team" button. The first page you see is where you can pick from a pre-defined sports template. These will auto-fill in information like positions and some example custom fields. Feel free to select a template and change it however you like later on.
Basic Info
Basic Info is where you set your team title. Be careful, as this team title cannot change in the future. You can also set other cosmetic options such as the theme color used around the app, whether there is a light background or not in the app, and if you would like to show nicknames for your players.
Positions
Now you can define your positions. These can be whatever you want, and you will have the option later to set your player's positions. You can also set a Most Valuable Position (MVP), which will give extra attention on events to users of this position such as showing how many have checked in for practices and games.
Custom Fields
The last section is where you define your team's custom fields. These have tons of creative options that you can use to really personalize the Crosscheck Sports experience for you and your players. Team Fields will show up on the team page, where user fields will show up on every user you add to your team.
Be creative here, you can keep track of allergies people have, their skill level, if they have paid team dues or not, and so on.
Hit the "Create Team" floating button to create your team!
New Dashboard
When you create a team, it will auto add you to the team and select it in settings, landing you on the team dashboard page. One thing has changed here! The presence of the team logo in the top left. Go ahead and click it.
This will bring up the team homepage. This page is viewable by everyone on the team. Here, you can edit your team as well. If you click the edit button, another option is present allowing you to add a custom icon. This can either be a link or an image you upload from your camera roll.
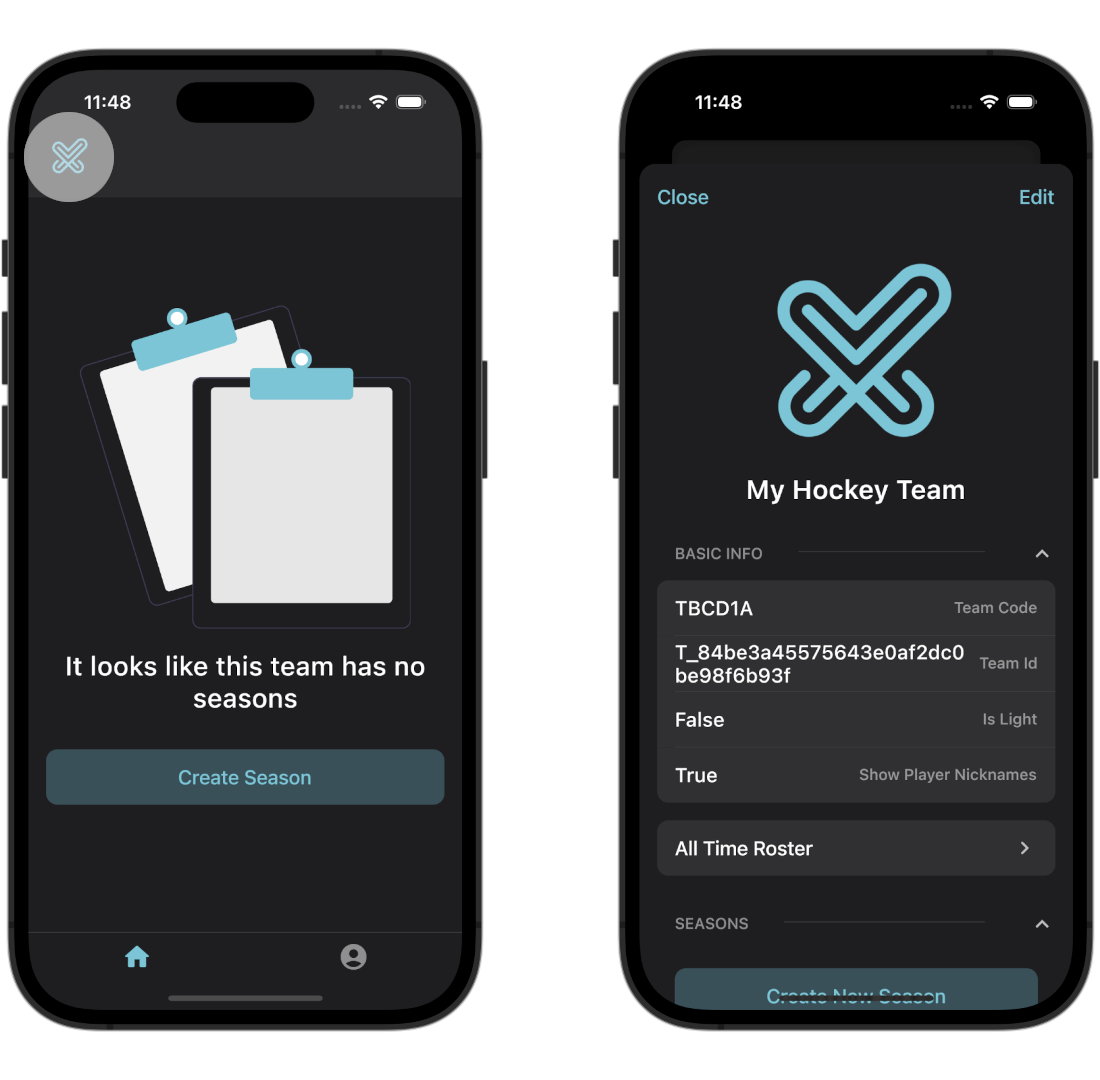
Team Users
There are multiple levels of users in Crosscheck sports, the base being a team user. This is a player that is on your team, but can be on none, one, or many seasons your team has. This can be thought of as a list of all the users that have ever played on your team! This can be useful when trying to find that one goalie from a couple years ago you were looking for, or just as a nice reminder of who you have played with over the years.
Adding a Team User
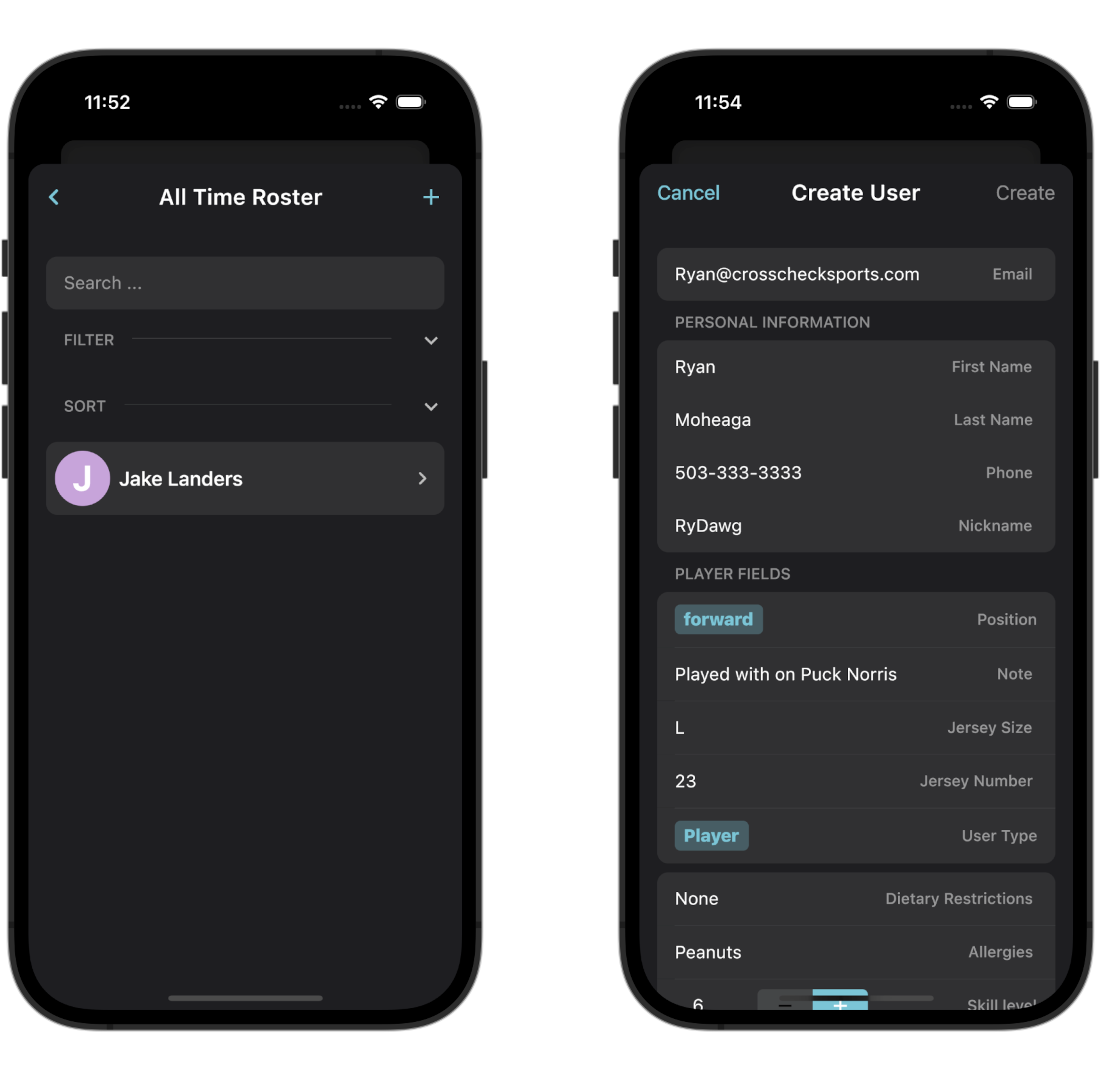
On the team homepage, you can select the option "All Time Roster". This will take you to a roster page where you are the only player to show up. Click the plus button in the top right to create a user.
Make sure the email is input correctly, and that the "First Name" field is filled out. If the user already has an account, the personal information should auto fill in. Feel free to edit the player fields as you see fit for this user as well.
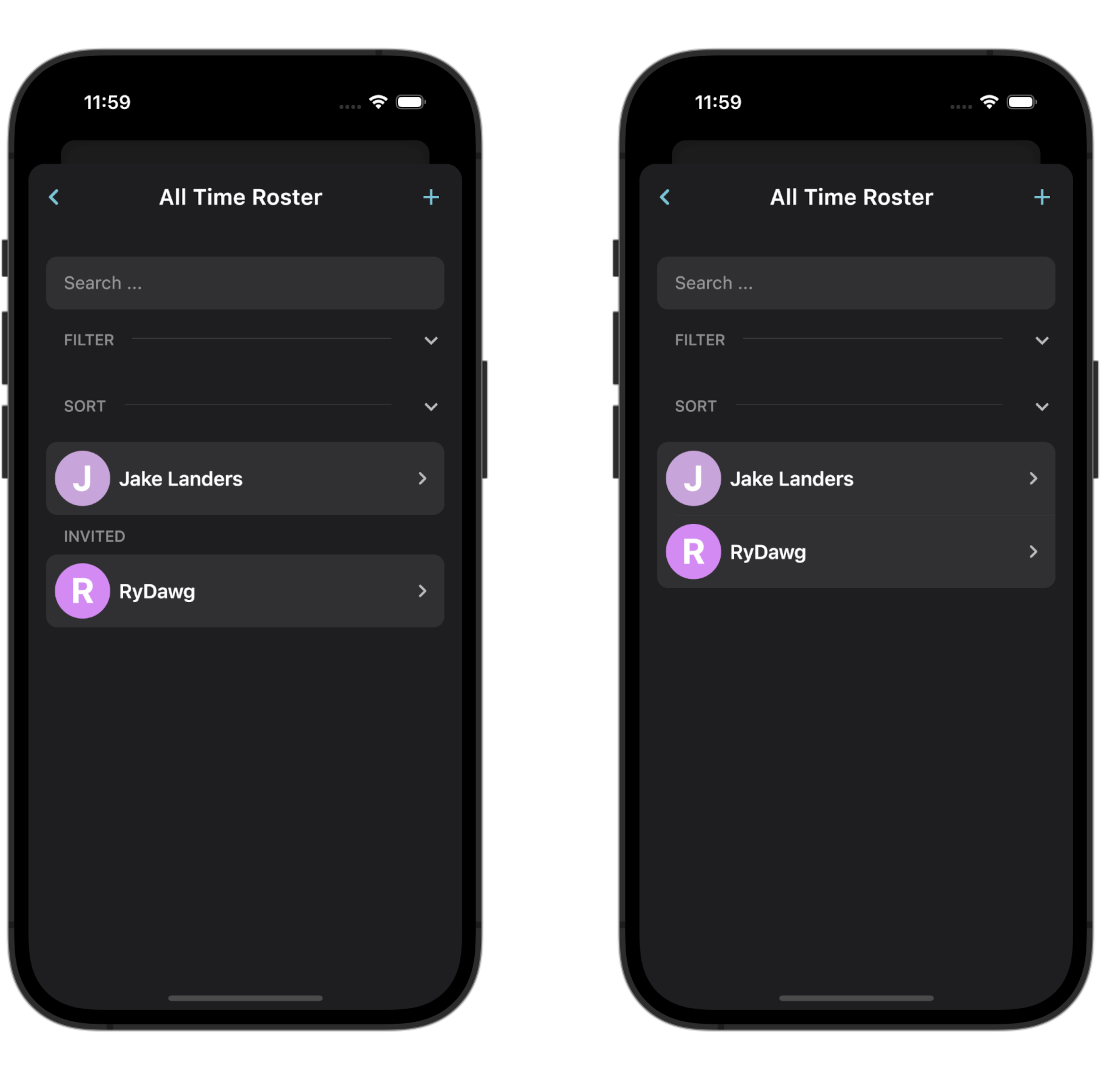
Validation Status
When users are first added to your team, they will be marked as "Not Validated". This means that this user has not accepted an invitation to be on your team. To invite them, select their user cell, then click the button "Send Invite". This will send an invite to the email address you input with a team code to join your team. Once they have been invited, you are free to send more invites, but they will be marked as "Invited".
When your player has accepted the validation email, they will join the main roster section. Here, you can also filer on position, and sort by a custom user field.
Creating a Season
You can swipe down on the title bar to dismiss the team page sheet. The dashboard now will show a "Create Season" button. Click this to launch the create season wizard.
This will launch a very similar view as seen in create team, with the same team templates serving the same function. There is also an option to start from a previous season, but because we do not have any none will show up.
Team positions and season positions can be different from each other.
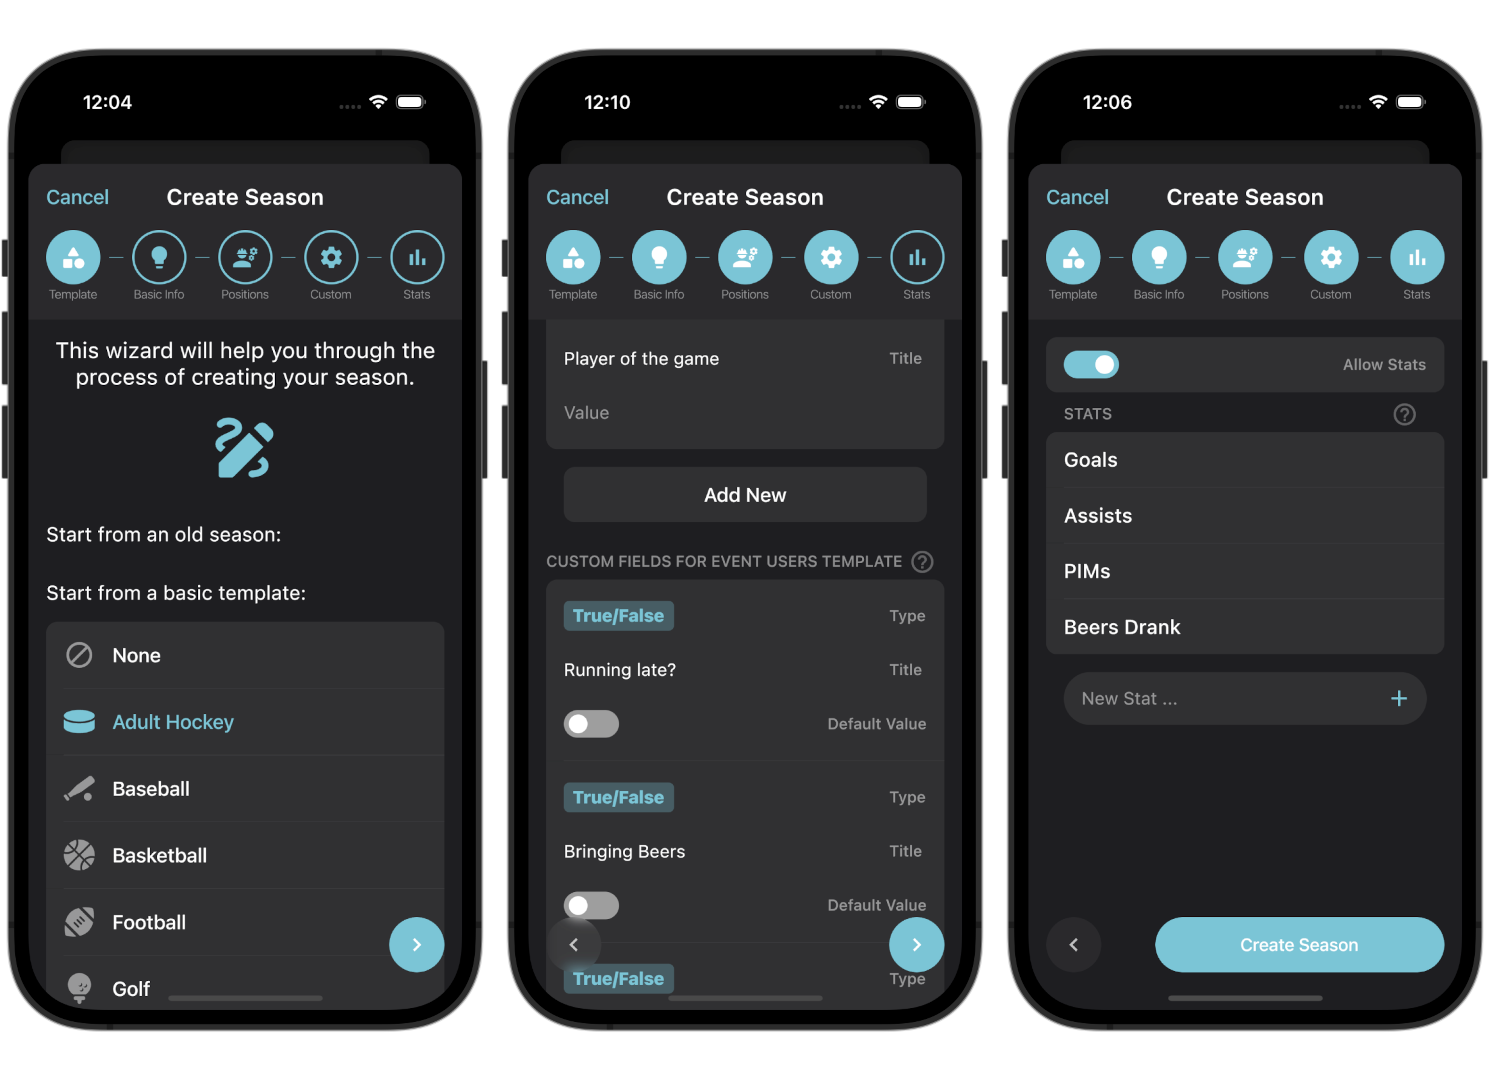
Season Custom Fields
There are the same options for season and season user custom fields that work similarly to the team custom fields. But there is another option that works in a slightly different way. This is "Event Custom Field Template" and "Event User Custom Field Template".
Event custom field, and event user custom field templates are where you can define custom fields and their values that will be added to all events that you create. Don't worry, if you want to create an event without these, then during the event creation process you can remove them. This is to give you an easy way to always have certain fields on your events.
Stats
These pages are mostly similar to creating a team with the addition of stats. First of all, you can decide whether you want stats to show up or not by checking the selection. This can be changed at any time.
Next, you can define which stats you want to track. These will all be tracked as number values.
New New Dashboard
When you create a season, you will see a red banner on the bottom. This is to remind you that created seasons start out in "Future" mode. This means that any user that is added to them will not be able to see or interact with them until they are published, set to "Active". This is to give you some time to configure your season.

Lots of new items have also appeared on the bottom bar, lets go through each of them, left to right.
- Dashboard page
- This is where your schedule lives. You can look at the upcoming schedule or the previous schedule, check into events, and change the current season (by selecting the title).
- Polls
- This is where polls for the season are. When there is a poll that a user has not answered, a notification will show on the bottom icon.
- Chat
- A rich chat room is created for each season where you can all chat about the game, life, or whatever you can dream up. It also supports images, videos, and dynamic link previews. Plus, it is all anonymous in the database.
- More
- This is where less active views live in the app. This includes the season roster, stats, a calendar export feature, the season page, and possibly more.
- Profile
- Your account
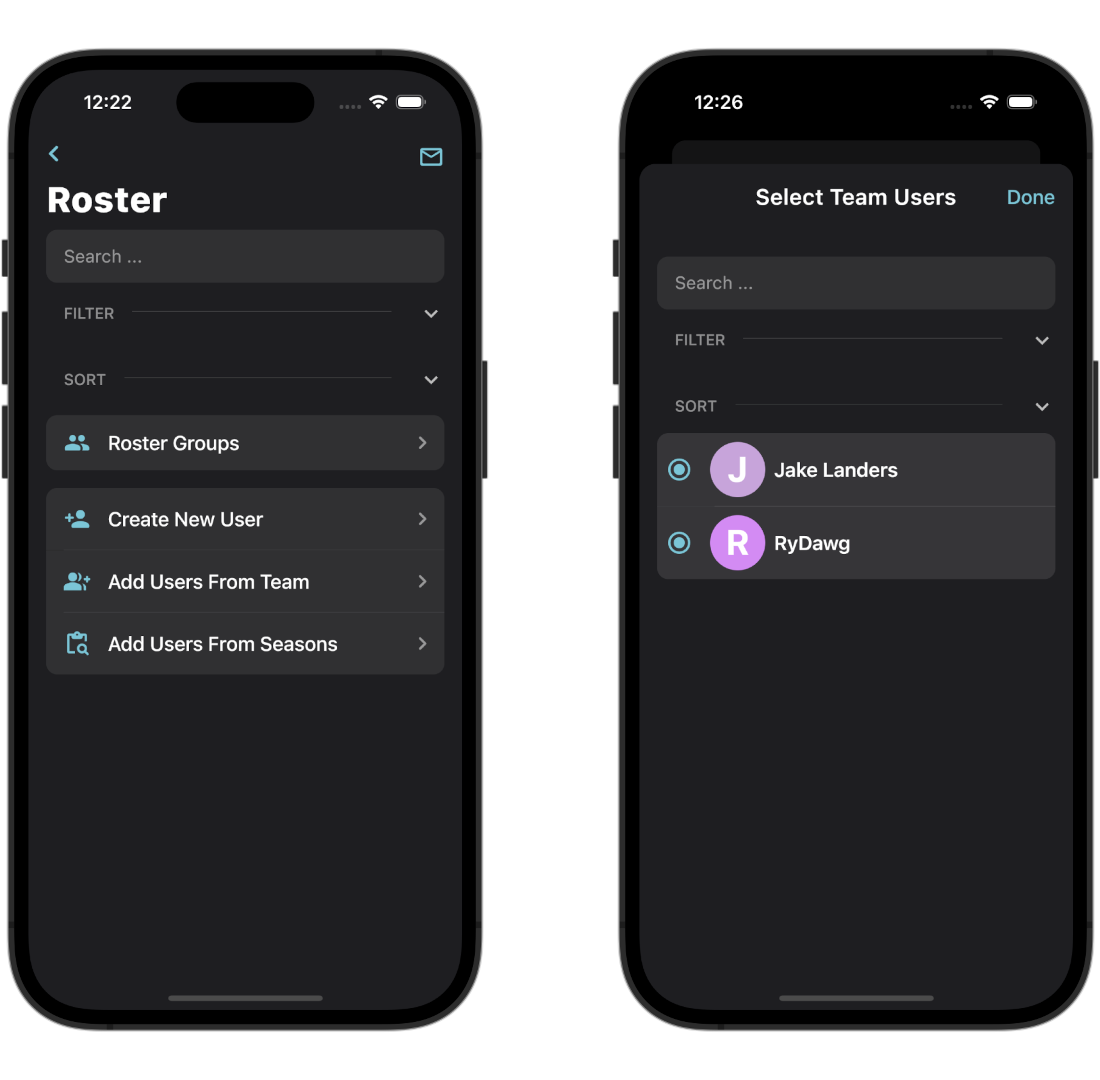
Adding Users to the Season
The season roster exists under the "More" tab. By default, no users are added to your season. There are three main ways to create users:
Creating From Scratch
This will show you a similar screen when we created a team user. This is where you can input all the information, and a team user and season user record for the email specified will be created.
Adding From Your Team
Another option is to look at a list of users on your team and select multiple to be added. This allows you to pick users that are already on your team and add them to the current season you are on. You can also edit various pieces of information about them such as their position, jersey size, and more.
We will be selecting this option. Hit the "Select Team Users", and select the users you want to add to this season. We then can click "Done". You can then select the user to make edits to their information. When you are done, make sure to click the "Save" button to save the changes to the user profile. Once all of your changes are made, click "Add" in the top right corner.
Adding From Previous Seasons
Lastly, you can import rosters from previous seasons into a new one. This is not applicable to us right now, but later down the line this can be a useful tool to pick and choose users from previous seasons to make a new roster.
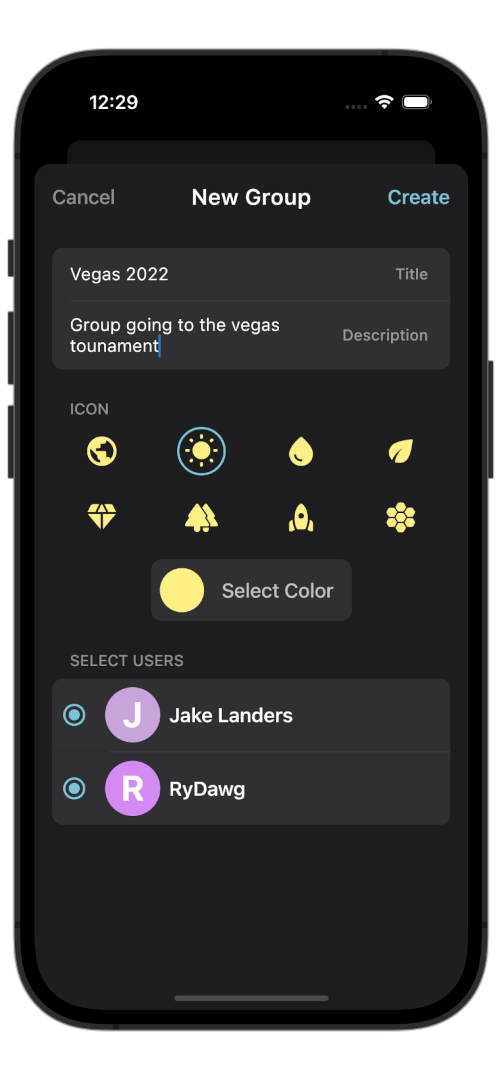
Roster Groups
The last thing we will go over is roster groups. These give you a convenient way to group users on your season together to later create events and polls with. Lets say you have a section of your roster traveling with you to a tournament, this lets you create that group once instead of selecting the same users over and over again every time you create a game event.
You can view your roster groups under the button with the same name on the season roster. Roster groups can have a color and icon, along with a description to give some information on what the roster group is for.
Conclusion
I hope you found this tutorial / walkthrough helpful! Please leave a comment if you have any suggestions for the app, and check out the marketing site at https://crosschecksports.com.